Followers

Wednesday, August 31, 2011

Wednesday's Work in Progress....

Adding some more strip webby goodness to my Spiderweb quilt....


It is coming along, but again, this is not a quick one to piece together....

Flanders is not impressed....

I have a basket tutorial on the Sew To Speak blog if you are interested in making some baskets :)
Happy Wednesday!
mary:)

Monday, August 29, 2011

Seriously Cute!

While searching for my mystery block...I happened upon a block from the 1920's....


I couldn't wait to get my walk in this morning so I could work on this little cutie pie!


Simple and sweet....I can just see a whole quilt of "Tallahassee" blocks....


Happy Monday Everyone!
mary :)

Friday, August 26, 2011

Brain Drain....

Ahhhh....I just can't seem to stick to just one project at a time.  In fact, I can't seem to stick to two or three projects at a time.  I am just going to tell myself this latest dip into the quilt pool is just for fun....we will see where it goes from there.
I have been looking at Pinterest...which can be a great source of inspiration....and if you are like me, it can also be torture.  There are so many amazing quilts, and crafts, food....goodness! 
Found a quilt I rather like....


So with my trusty freezer paper I have been trying to figure out what seems like a simple block....block seems fairly simple, but how the quilt goes together turns out to be a bit baffling.


It is a vintage quilt and I am fairly certain it was hand pieced.  Honestly, I think it would be easier to piece together by hand. 


I am really not certain how the rows are added....I can't see how it is done without a Y-seam....again, I think this would have been easier to put together by hand.  Some things just are. 


I will keep working with it and then I will post more proper pictures.  It is awfully cute....very scrappy and patchwork-y and cute :)

And speaking of cute...my UN-CHEERY Basket Quilt is sporting one of my favorite Liberty fabrics....I only had a tiny bit left so this sweet little basket gets to wear it!

  
Busy weekend ahead for us...hope you have fun plans as well...
mary :)

Tuesday, August 23, 2011

Way Down Yonder in the Paw-Paw Patch....

When I was a young college student studying to be an Elementary School teacher....I applied to be a part of a select group of students that would learn and teach Education Through the Arts...
The idea was simple...take a concept and develop lessons to teach that concept using all forms of art.  So we were dancing, singing, drawing, painting and acting our way through the multiplication tables!

It made so much sense to me - in fact, my own children didn't realize it, but I taught them {before sending them off to kindergarten} using the same techniques.  

I think I approach quilting much the same way....
I have baskets on my mind this week - partly to blame on Molly {love the name} and her sweet little quilt....

So I have been making baskets....


Baskets with Rik-Rak....and baskets from Dresdens....


This basket idea has been floating around in my brain...so I used a bit of my Birch fabric, part of an old vintage table cloth and dress it up with some lace, ball fringe and of course, Rik-Rak!!!  Maybe a bit too fussy....


But my real purpose for working with baskets is to develop a quilt for my living room.  I have a large wall space that has always had a quilt hanging.  Right now I have my Cheery Dresden Plate, but my children complain that it is just too cheery.  So I have been thinking about what would suit this space and my tastes, but for goodness sake not be too cheery!

When I stumbled upon Molly's {Country Hill} quilt I thought that just may be the ticket...

  
So I gathered some off whites and linens.  I do love a pieced background...it gives a quilt texture and depth....

And I began piecing baskets....


I am fighting the urge to use dots and bright colors....it is a struggle...LOL!


But I do love subdued tones...and the whimsy of these liberated baskets....


Oh, and the Paw-Paw.....that was a song my mom sang to us when we were little.  In the song you would put them in your pocket, but I suppose you could put them in a basket :)
Happy Tuesday....I just felt the earth shake a bit ago...a 5.9 earthquake in D.C. area....wow!
mary      

Aurifil Giveaway Winners!!!

Wowza!  I wish I had a pack of thread to give everyone who left a comment....although I don't think I would like the postage :)   But rest assured, I am certain there will be more Aurifil giveaways throughout blogland....
This morning I used the infamous Random Integer Generator to choose 5 winners and here they are....

#174 - Dolphinlady from Winlock, Washington
#8 - Rachael from Belfast
#96 - Jean from Council Bluffs, Iowa
#192 - Sandie from Carlsbad, California
#220 - Piggyscraps from Germany

Yay!!!  Congratulations to all of you!!!

I will be sending each of you an email to get your address!

I could not find email addresses for Dolphinlady and Piggyscraps....so please email me with your address - you will find my email address just below my blogroll...

Thank you everyone for entering and a BIG thank you for all the lovely comments...
you make my heart happy :)


mary


Friday, August 19, 2011

A Day of Firsts....

As I planned this post I realized that this is a day full of firsts....
I used my scraps of Birch fabric to make a little pillow of simple patchwork....


This was my first experience using Wool Aurifil Thread to machine stitch the pillow top....
The Wool Aurifil is 50% Wool and 50% Acrylic.  Acrylic is a man made fiber often used as a substitute for wool. 


I am pleased to say I love the results....it is a heavier thread {12 wt} and at the same time a bit of a loose twist.  So the thread definitely has the appearance and feel of wool....the real test was how it would perform in the sewing machine.


To prevent the thread from shredding, I used a metallic needle.  A metallic needle has a larger eye - so less friction on the thread.  I also adjusted the speed of my machine to slow down my stitching...again a great idea to keep thread from shredding.


The squares are 3 inches square...and the entire pillow is just about 12 X 18....I stuffed it full with a small travel pillow.  I really love this pillow :)


So on to my next first!  I am pleased pink to be able to share samples of Aurifil thread with you!


  Yes....this is my first giveaway!!!  YAY!!!  
I will keep this easy...just leave one comment on today's post and you will be registered to win.


  I will close the giveaway on Monday at midnight....and the winners {yes I said winners!}  will be chosen at random and be announced {hopefully} on Tuesday.... August 23rd. 


And now for the best news yet....I have 5 sample packs...so there will be 5 winners chosen!!!  Yippee!!!  Do the Happy Dance :)
Just be sure if you want to win that you are NOT a No-Reply Blogger...
I want to be able to find you and let you know that you are a Happy Winner!

I did have another fun first today.  I worked on a cute little 'person' block for a student in my quilt class....I thought she may like to incorporate this idea in her quilt...


I first fell in love with people blocks when I saw the adorable block done by Marit....
How cute would it be to dress your person in those bits of baby clothing saved from when your children were little.  

    
And now, just one more first....I continued plugging away at my first ever Spiderweb Quilt...Or Star Quilt....however you want to look at it :)  I wanted to share my progress with you!


Whew....what a day!
Have a wonderful weekend!
mary :)
  

Wednesday, August 17, 2011

Linked- Chain Stitch Tutorial

Hey this is Molly! So as promised by my mom I am coming up with a series of embroidery tutorials for some of my favorite stitches.  I love the linked- chain stitch and use it often... its great for borders, creating pretty little flowers (called a "lazy daisy") and adding accents to fill up blank space.  Its also a cool stitch to know because it looks complicated, but in fact, is really easy to do! So here we go... :)


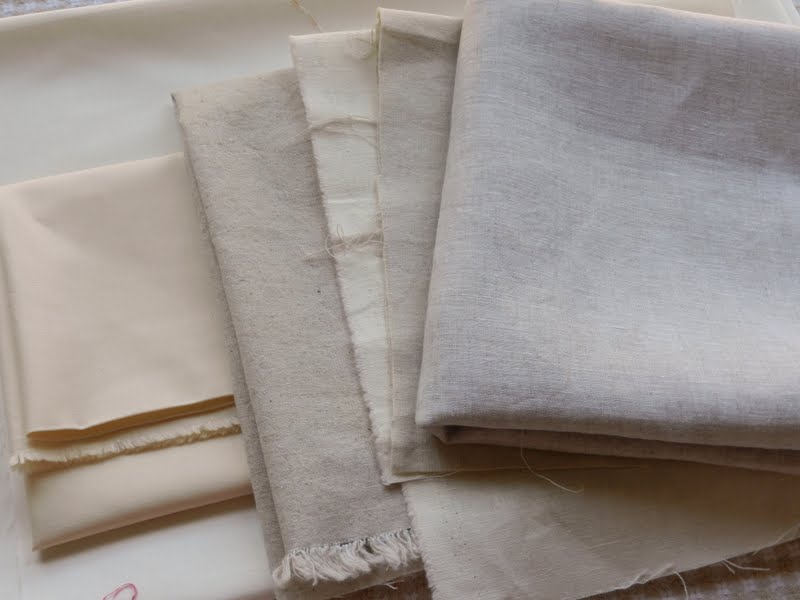
Ok, so to demonstrate these stitches, I have decided to put them all into a sampler.  In order to make sure I stitch in a straight line (which is not my forte) I lined some making tape up with a ruler and applied it to the fabric so it could direct my stitching.  After this I'll probably just follow the guideline of my first row of stitching.  Also, for this project I am using a piece of toweling as my background fabric, mostly just because I like it.  However, if you are thinking of making a sampler or any embroidery project you can really use any type of material as your background (Note: linen is not my fabric of choice because it tends to shift away from you and sometimes you end up with some wonky lines).


Next I put my work in a hoop.  This is pretty self explanatory, but you want to make sure that you get most of the fabric into the hoop, even if the place where you are going to start is way at the top like it is right here.


You really don't need much to do an embroidery project, but some supplies that will be essential are: an embroidery needle (different from a regular needle because it has a large eye), a hoop (right here I am using an 8 inch hoop, but they come in many sizes) and embroidery floss.  Now, embroidery floss comes twisted in strands of six, its fine to use the embroidery floss as a whole, but I generally split it in half so that there are only three strands in the thread that I work with.  (that is shown above)
 
 
So now its time to start stitching! You want to come up through the bottom of the fabric at your starting point.  Then you will put the needle back through the fabric very close to or at the point where you came through...
 

...then you want to pull the big loop you have made into a smaller loop (this loop will still be bigger than you want your actual stitch to be, but it will be much more manageable to work with). 


After you have made the loop bring your needle up through the fabric about a quarter of an inch away from the point of origin. (Note: where you bring your needle up through the fabric at this stage determines how long your stitch is going to be. It can be longer or shorter than a quarter of an inch, but very long linked-chain stitches tend to close up and look less plump)


Next you will want to hook your loop on the needle.  After this pull the rest of your thread through the fabric and the loop creating a tear drop shape with the thread coming up from the rounded part.  ( You don't want to pull too tightly during this step because too much strain on the "teardrop" will also cause it to scrunch or close up and may not produce the desired effect).


Now for the final step! You will essentially make a small stitch originating from where the thread is coming up from the rounded end of the teardrop and going back into the fabric a small distance away  (this stitch should really only be half as long, if not less, as the chain or teardrop).  This stitch is the "link" in the chain stitch and also serves to anchor it. 


And this is what your stitch should look like after it is completed!


 If you want to do a row of these stitches you would want to come up for the beginning of your next stitch underneath the "link" part of the preceding stitch (as in the picture above) so that it looks as if these chains are linked together.


And this is what my row looked like after it was completed (and all the tape was taken off ... lol).  This was my first tutorial ever - so hopefully everything was clear and helpful. Have fun stitching! 
-Molly
 

Tuesday, August 16, 2011

Coin Quilt....

Lest you think I have been sitting back with my feet up and eating bon bons, while Molly does all the heavy lifting.....hee, hee....well maybe I have just a little ;)

My little sample for the shoppe is finished....pieced, quilted, bound and delivered....


This is a Coin Quilt using the very sweet Birch fabric....Storyboek.....
This quilt has 5 stacks of coins separated by a lovely muted grey whale fabric...


I quilted this with Aurifil 12 wt. cotton thread in an ivory color....BTW.....look for an exciting giveaway coming soon!!!!
This is a heavier thread than I usually quilt with {in the machine} so I was a little worried that it may just shred as it passed through the needle...but Aurifil is such fantastic thread it worked like a dream!!!


After machine quilting with 'organic' straight lines....I added several rows of pick stitching with perle cotton.  The pick stitching travels in the opposite direction of the machine quilting.


I used white kona for the back, pieced with selections of Storyboek....


added a little log cabin...


And, inspired by Molly, I pieced the binding....


I have to say...I love the materials used in this quilt.  From the Organic Birch Fabric {I wish you could feel this fabric}, to the AMAZING Aurifil thread, to the sweet added touch of Valdani Perle Cotton....


This was a great quick project...now I need to get back to my spiderweb quilt....
and my Grandmother's Flower Garden....whew!
So stay tuned....I will be conducting my first ever giveaway {details coming soon}.... yee-haw!

I leave you with one last look at the Storyboek Coin Quilt...


Happy Tuesday!
mary